Home › Word letterhead tutorial
How to Make a Letterhead in Word
Build a reusable Word letterhead with an editable logo, name and contact details. Start with a free template or create a header from scratch, then check the second page before saving your master.
Want a head start? Download a free Word template or use the maker to include your own logo before downloading. The Word version uses a simplified header that you can edit.
1. Set your paper and margins
Create a blank document in desktop Word. Choose Layout › Size and select Letter or A4 to match your paper. Start with 1-inch left and right margins. Leave enough top margin for the complete header plus some breathing room before the letter. A tall logo may need a larger top margin.
2. Open the header
Double-click the top margin, or use Insert › Header › Edit Header. Put the letterhead here so it stays separate from the message. By default, the same header repeats on each page.
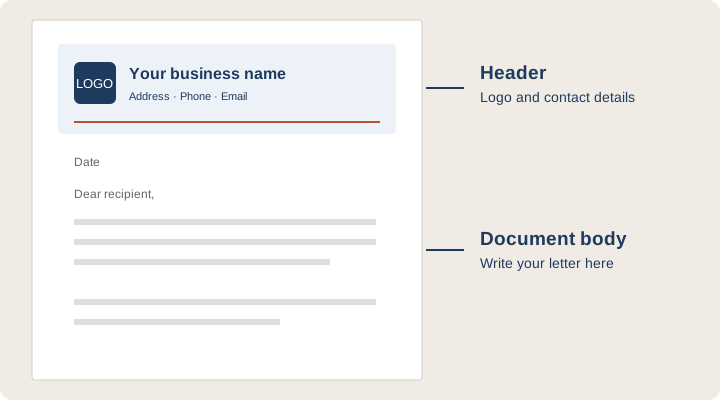
3. Add a logo and align your details
With the cursor in the header, choose Insert › Pictures and select a PNG or JPG. Keep the picture in line with text for predictable positioning. Resize from a corner; around 0.5–0.75 inch high is a useful starting point.
For a logo on the left and details on the right, insert a one-row, two-column table inside the header. Put the logo and business name in the left cell, contact details in the right, then remove the table borders. Avoid aligning content with repeated spaces.
Use roughly 16–24 pt for the name and 9–11 pt for contact details. Print one test page to judge readability rather than relying only on the zoomed preview.
4. Add a divider and footer
Place the cursor in the last paragraph of the header and choose a bottom paragraph border from Home › Borders. Use your brand color for a thin divider. If the contact details crowd the header, move them to the footer by double-clicking the bottom margin.
5. Check the letter area and second page
Close the header and type a sample letter. Add a second page with Insert › Page Break. Make sure the first line of body text clears the header and that the footer does not overlap the message.
To repeat the same letterhead on every page
Leave Different First Page off. The default header repeats automatically.
To show the full letterhead only on page one
- Copy the current header content before changing the setting.
- Enable Different First Page. Word creates a separate first-page header, which can initially appear blank.
- Paste your letterhead into the area labeled First Page Header.
- Go to page two and remove the full letterhead from the regular header, or replace it with a smaller name or logo.
- Repeat the process for the footer if it should also differ, then inspect both pages again.
Microsoft explains the separate first-page setting in its guide to changing a header on a single page. Turning the setting on alone does not move the existing letterhead into the first-page header.
6. Save a reusable Word template
Delete the sample message and save a master copy. In desktop Word, choose File › Save As and select Word Template (.dotx). Create new documents from that template so the master stays intact. If your edition does not offer template creation, duplicate the master .docx before writing each letter.
Common problems
- The first-page logo disappeared: inspect Different First Page and paste the logo into the first-page header.
- Text overlaps the header: increase the page’s top margin; changing only “Header from Top” moves the header without reserving enough body space.
- The logo moves: keep it in line with text inside a borderless table.
- The printed color band has a white edge: most home printers cannot print full bleed. Keep an inset border or use a print shop.
For another editor, see Google Docs letterhead templates. For output, read the printing guide.